Friday, 13 October 2017

A New Game Progress (finally finished filming!)

This weekend, we managed to finish filming the UI segments. Now for the rest of the month we'll be working in Adobe Premier Pro and Aftereffects to polish up the animation and add sound files.

Here's a .gif of the possible UI selection options that we will incorporate into our animation using Aftereffects

Stop-Motion Review: Foxed! (2013) by James Stewart

Image result for Foxed! 2013Foxed! is a short film about a cautionary tale of a young girl who has been kidnapped and forced to work in a mine by foxes. The stop-motion work is really smooth (even if for some scenes, the girls face wasn't that expressive), and the lighting is superb. I particularly enjoyed a shot where you see the girl, but the shadow behind her is that of a fox- either that has been done by creative lighting and model placement or the same scene had been shot twice (one with the fox, the other with the girl) and composited together. Even though the story of Foxed! was darker than I expected, I still enjoyed this short immensely.

Monday, 9 October 2017

Catprint progress

This week I worked on flattening out some of the scenes, as making them "3D" has caused them to disregard the layer order and introduced more problems than it solved. I also coloured some of the frame-by frame scenes. This weekend, I'll probably work on animating the Monk's arms frame-by frame to be able to finish the writing room scenes

To keep myself entertained, I finished animating and coloured some of the scenes, especially those with Mite (the cat)

 I managed to finish off the ink-making scene. I attached a transparency node to the inkwater to get it to slowly change colours. To get the transparency node to work, I linked it to the ink water node through a 'image' link and keyframed the transparency to go from 70 to 0 (mostly transparent to completely opaque).

I managed to pull Manuscript transcripts from https://lichfield.ou.edu/st-chad-gospels/gallery for the areas of the animation that require the illuminated manuscript to be in the shot


you can see where I had put in the manuscript text in this scene of the animation

Sunday, 8 October 2017

A New Game progress (UI segments)

A New Game Progress:

Today we had Marilyn hire out a tripod and D90 for filming the UI segments. Because she had to hand it back the following day, we marked the floor where the tripod is going to sit for follow-up shoots.
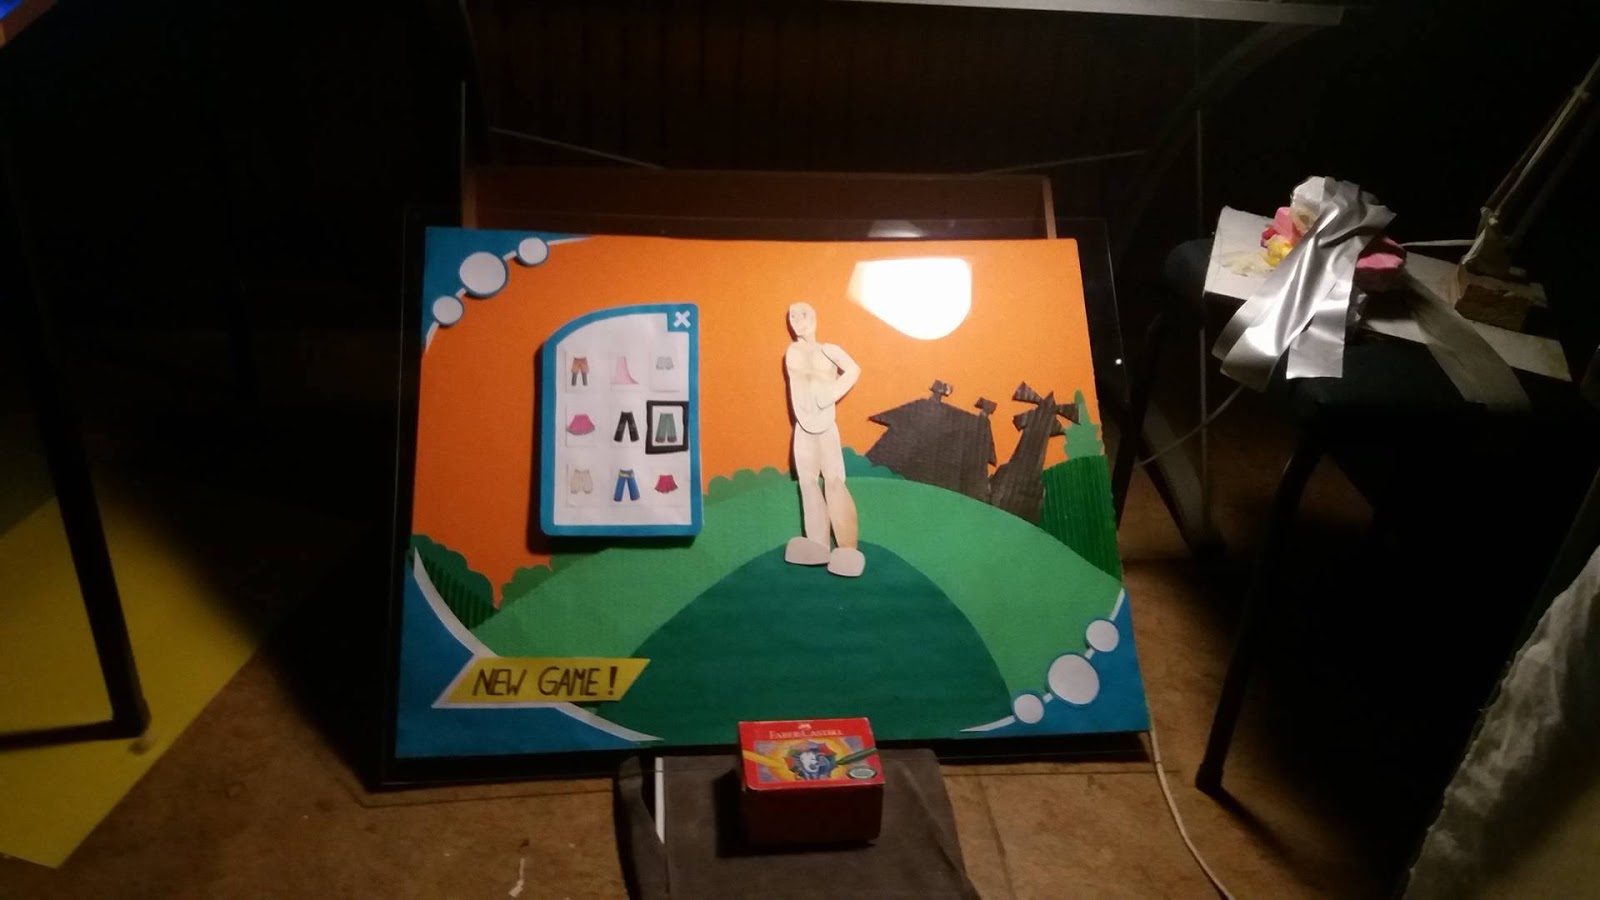
An image of the UI segment

 A shot of the UI, showing some of the lighting we did
 Another shot of the UI- from the camera's POV the lights reflection wont be visible
 The UI segment, the computer with dragonframe and the lamp, ready for filming

I also learned how to import the dragonframe image sequence into Adobe Aftereffects. A new project, then a new composition must be made and exported and rendered as a Targa sequence, so it can then be imported into Adobe Premier Pro. Premier Pro acts as a digital cutting room, where the image sequence can be cut, pasted, looped etc.

Stop-Motion review: Chirrut vs. Everything (Kevin Ulrich)

https://www.youtube.com/watch?v=T5jK4XnaAQQ

Chirrut vs. Everything, is a Lego stop-motion short made in collaboration with How It Should Have Ended and Brotherhood Workshop. The short is an action-packed extended fight between Chirrut Imwe, the blind warrior-monk from Star Wars: Rogue One, and literally every bad guy in the film during Chirrut's penultimate scene in Rogue One. I found this short to be entertaining, especially the interactions between Chirrut's allies watching his epic 4-minute brawl. This short is also incredibly action-packed, an impressive feat considering that it is stop-motion, with Legos. It appears that the the lip-synching, expressions and light saber effects had been done digitally in post-production.

Sunday, 1 October 2017

A New Game progress (filming at last!)

Here's the first scene we shot. It's Zack playing on the controller, until Lulu powerslides into frame (while saying "Heya Zack!"), stands up and says "Watcha doooing?". We had the characters remain completely stationary while talking so we can copy and paste the frames necessary to time out the shots.

While shooting, someone accidentally knocked the tripod holding the camera, causing the scene to shift so we taped it and the chair holding the light down to prevent further shifting.

I then timed out the lip flaps for act 1 by importing my animatic to ToonBoom, setting the framerate to 10f/s and counting the frames to each sound/ lip movement


 A screenshot of the excel sheet I made. I colour-coded the dialogue to the characters and added notes to help make the printout easy to understand


Here's a .gif of the progress we made in our second session.
It went a lot faster as we had our lighting and camera already set up and I had timed out the dialogue (although it may be unnecessary because Adobe Aftereffects can time out dialogue). In all, we made about 20s of footage in 3 hours, so in the next session we'll be able to finish act 1 if we're lucky.

 Chloe setting the scene
 Chloe sorting out the lip syncing during the shoot
 Marilyn on Dragonframe


Marilyns hand was caught in a frame, but that can be edited out using Adobe Aftereffects.

We finished off act 1 and we plan on doing the living room scenes in act 3 before the holidays finish as I have to return the equipment and We don't want to do the lighting and camera placement again.


Stop-motion review: The Maker by Christopher Kezelos

Image result for the maker stop motion 

The Maker is a short film about a rabbit-creature racing against time to make another of itself. Although I was a bit leery of the creation seemingly immediately falling in love with the creator, I was immediately fascinated by what happens when the hourglass ran out and was reset.
I found this film to be interesting, as the small complex elements of the creatures workshop were interesting to catch on repeat viewings and the musical score matched the frantic (and deliberately repetitive) pacing.

The making Of video is also interesting to watch (https://www.youtube.com/watch?v=KavpG2t6qD8), as it shows the level of detail that went into each shot, as well as detailing the process from concepts to animating.

Monday, 25 September 2017

A New Game progress

Today we finished the eye and mouth cutouts and did some animation tests using Dragonframe.


 We started off by cutting out the Lulu and Zack eye and mouth shapes and sticking them onto the clay models.

We decided to test the lip and eye syncing and claymation for the living room scene using Dragonframe.

 Here's the resulting .gif file

 Here's what it looked like to set up Dragonframe (bonus me on the side)

We also did a walk cycle test with Lulu and nearly destroyed her legs in the process. Luckily she'll only be walking at the beginning of the claymation.

Here's Lulu walking (click the gif to get it to move again).

Stop-Motion review: The Nightmare Before Christmas (1993, Henry Selick)

 Image result for the nightmare before christmas\

 The Nightmare Before Christmas is a stop-motion classic directed by Henry Selick and distributed by Buena Vista Pictures. The film follows the (mis)adventures of Jack Skellington, the Pumpkin King of  Halloweentown; who suffers from burnout after planning Halloween year after year. Jack becomes inspired again when he falls through a portal into Christmastown, where Santa Claus and his elves are busily preparing for Christmas, and decides to take over Christmas as an act of goodwill. From the beginning, Jacks friend (and love interest) Sally knows that this cannot end well. Seeing as Jack didn't consult Santa on this development and he (and the residents of Halloweentown Jack talked into helping) have no idea how Christmas works; Sally ends up being right, Jacks plan falls through and Santa ends up in the clutches of the gambling sack of bugs, Oogie Boogie.

Even though this film was released 23 years ago, it is still an enjoyable watch. Now that I am making a stop-motion project myself, I have a new appreciation for how they managed to get the lighting for some of the scenes as well as some of the wind interactions with clothes, hair etc..


Catprint progress

This week I worked on the backgrounds some more


The white areas are transparent so I can make animated backgrounds on ToonBoom

I also continued doing the frame-by-frame of the characters.

Monday, 18 September 2017

A New Game progress

Today we did more lighting tests and cleaned up our sets.

Lighting tests:


 We set up the living room set so that it would be quite dim, with the main source of illumination coming from Zack's videogame. The LED lighting was from one of the tracing boards that was in the stop-motion workshop, which had a TV mockup around it.

We had to re-learn all the camera settings, such as exposure, F-stop and Iso. Basically, Iso should be low, exposure should be less than 2 seconds and F-stop should be able to keep all the relevant detail in focus, then fiddle around with the lighting until the desired result is achieved.


The LED screen with the TV mockup around it

Zack and Lulu in a dimly lit living room. Lulu was put in front of the couch as in the beginning of the animation, she will skip around the couch and will need to be in focus at all times.


 Lulu and Zack with the lights on


Lighting tests with just the LED light


We did some pictures with some lamps for additional lighting to soften it, but the lamp had to be held at such an angle that figuring out a way to maintain it for the animation was going to be difficult.


We found a wooden frame to support the set without having to rely on the (structurally unsound) dividing wall. The camera is zoomed out a bit too far in these pictures as you can see the corners of the set.We also swapped out the LED tracing screen for the smaller, lighter Swit light


 We did some more lighting tests with the UI, mostly because we put it on a slanting table and we wanted to make sure that it would work. We have yet to achieve a good camera angle that captures all the details in the videogame UI.

Behind the scenes:

 This was when we were doing set lighting. I was fiddling with the camera settings and Marilyn was in charge of holding the TV lighting apparatus

 Us doing lighting tests on the UI


 Chloe was working on colouring in the cutouts for the UI section of the animation, and you can see some of her work here


Closeups of the pictures I drew for the photos on the livingroom wall. They also have the only representation of  the mother character (she yells a single line from the neighboring room and does not actually appear in the animation).

We also did some final paper cut-out work on the weekend:
 Eye and mouth shapes for both Lulu and Zack for the living room scenes (we plan on having their lip-synching similar to that in Robot Chicken)

 An example of the final cutout of the videogame character

 An example of some of the clothing options

 the clothing options with one option selected

Stop-motion review:


Chase me (2014) Gilles Deschaud

Image result for gilles deschaud chase me
 Chase Me is the multiple award-winning stop-motion film directed by Gilles Deschaud, made entirely using 3D printing. Chase Me is about the journey of a girl playing the ukelele, whilst being chased by a nebulous monster through a colourless forest. The music in this show was enjoyable, catchy and the animation timed well with it. While some of the stop-motion was a little jittery, this short was well shot and had excellent movement, lighting and use of colour throughout.